So, what were your symptoms?

Something’s afoot. I’ve gotten multiple messages today asking about the symptoms that lead me to my stage III rectal cancer diagnosis. And I think this is important information to share.

So why don’t I just spell it out here? Buckle up for some poop talk!!

In late 2015, I started to have more urgent poops. I’d get the urge to go and I’d take off like a shot to the potty. I always made it, but there were some close calls. Around that time I also began to notice the sensation that I never quite emptied my rectum, either; I’d finish pooing but it felt like there was more in there that needed out. I had skinny poo–like, the diameter was smaller than normal.

I also lost some weight. This was a sneaky sign because I was actually trying to lose a little weight at the time, and was fiddling with my diet and exercise so that as my weight dropped 1-3 pounds per week, I wasn’t surprised. In retrospect, I attribute some of my weight loss to my diet/exercise, and some to the growing cancer.

All of that was quite gradual. Each symptom became more noticeable over the course of several (2? 5?) months. I was still adjusting to postpartum life (I think my symptoms began around my baby’s first birthday in October) so noticing my own physical needs and sensations and just fuckin wrapping my head around the concept of time was pretty challenging.

Then, in early 2016, I began to notice some bloody, mucus-y output. Not every time I went, and maybe not even daily. But every so often, I’d notice some pink-red blood that didn’t look quiiiite hemorrhoid-y. Also, snot? That’s weird.

I’m very glad I talked with my doc. I have a straight-shooting no-nonsense conventional internal medicine PCP, and I’m so glad she listened and referred me to GI. I’m so glad the gastroenterologist I saw ordered a colonoscopy. I had that colonoscopy on Friday the 13th of May, 2016.

The incidence of colorectal cancers in younger adults is increasing, and it’s not due to better detection. In fact, most younger folks are diagnosed at later stages than folks over 50. Many providers have historically approached younger patients with rectal bleeding with lines like, “oh, you’re so young, it’s probably hemorrhoids/whatever, not cancer, so we can defer the colonoscopy.” THAT’S NO LONGER SOUND CLINICAL DECISIONMAKING.

I’ve noticed that there are three main ways that people ask me about the symptoms that started the party.

  1. With genuine concern and curiosity about the experience (an attempt to connect).
  2. From a space of vulnerability and concern about their own symptoms and risk (also an attempt to connect).
  3. With fear and a desire to confirm that we are in fact quite different and distant, and this could never happen to them (an attempt to separate).

Regardless of where the question comes from, I’ll always answer it. And for the love of cheese, if you are having any sort of weird symptom anywhere that makes you want to ask me what MY cancer symptoms were, CALL YOUR PCP!!!!!

I’m always a little sad for the person who asks out of that third space (one can tell). Because we’re not separate. Anyone’s life can be turned upside down at any moment. Accurate cliche: It. Can. Happen. To. Anyone.

Which must mean, in fact, that there’s nothing wrong with me for having gotten that cancer. That I have nothing to be ashamed of, and neither do you. I can be free to be an organism, a living being with a body with all sorts of idiosyncrasies. Due to and in spite of my conditions, I am whole, and connected to all.

This experience has taught me about the power in leaning into that connection. Showing up here is one way for me to do that. Thanks for joining me.

Tilapia with rice and zucchini

How do I title these posts? What’s the most user-friendly? The recipe or meal description seems to make sense. But “tilapia with rice and zucchini” sounds boring as hell. It does not beGINNN to portray how fucking good this was.

And because I had rice in the fridge, it took 15 minutes.

The tilapia

  • Frozen tilapia filets
  • Garlic-infused oil or ghee if you can tolerate it, or tasty fat of choice
  • Cilantro leaves, small handful, coarsely chopped
  • Flat-leaf parsley leaves, small handful, coarsely chopped
  • Lemon
  • S&P

Heat a heavy nonstick skillet over medium high heat. Add oil/gee/fat. Slip frozen tilapia filets directly into pan. Do other stuff for about 4 minutes. Then come back and season with salt and pepper. Loosen from pan if stuck. Allow to cook another minute, then flip. Cook 2 min more. Fish is done when opaque and flakey with crust of golden brown deliciousness.

Sprinkle on herbs, squeeze of lemon.

The zucchini

  • 1 med-large zucchini
  • Yummy fat of choice (I used rendered bacon fat from low-FODMAP bacon)
  • Pinch of low-FODMAP curry powder (it exists! O Organics and Simply Organic make some, for instance; or you can make your own blend)
  • S&P

Cut zucchini into half moons (or if your zucchini is girthy, quarters). I like my slices a little thick–like, a little thicker than half inch–and I cook them over high heat in cast iron so they get crusty on the outside and firm-tender on the inside, so that they’re like meaty steaky squash bites. Fortunately, the method for achieving this outcome is really easy.

Heat fat/oil in cast-iron skillet over medium-high. Throw in the zucchini and season with salt, pepper, and a pinch of the curry powder. Ignore them for a few minutes. Do not shake, turn, stir, or otherwise agitate the skillet. After a few minutes of neglect holding vigil, move a piece and see if the side that’s been in contact with the pan has browned sufficiently. If so, yay! Stir and flip. Turn the heat down to medium and cook a few minutes more, stirring occasionally.

The rice

  • Rice

Microwave. If you’re my husband, apply coconut aminos.

Fuckin YUM.

What’s for breakfast?

Today, it’s the usual. I’ve had this every morning for weeks.

Cream of rice cooked in unsweetened vanilla Almond Breeze almond milk, with a pinch of salt and teaspoon of soy-free Earth Balance. Maple syrup. And when I feel like I have the capacity, a breakfast sausage. Green tea, Metamucil, and Florastor.

Thrilling.

I’ve met a few people with IBS, redecorated guts, or other functional gastrointestinal disorders who have a similar routine–well, who have a go-to breakfast like this that they eat essentially every day.

Breakfast is kind of a tricky meal. I mean, the name–you’re breaking a fast that has lasted for hours. Your guts have been resting all night (if you’re lucky) and then you go from 0 to 60 by dumping in some chow. Breaking a fast, I’ve learned, gets my gastrocolic reflex poppin’. I make sure that I’m gonna be home for at least an hour (or two, if possible!) after I eat brekkie so that when my post-breakfasted gastrocolic reflex hits, I’m close to Home Potty.

The More You Know.

🤣💩

BUT SERIOUSLY. WE NEED TO TALK ABOUT THIS STUFF. I know I’m not alone.

You out there, already nervous about food for the day, and it’s only 7 AM? I raise my glass of Metamucil to you. There are literally dozens of us!!!

Bread dough AND pizza crust

Why not both?

Seriously. This bread dough makes a delicious rustic boule, or baguette, or PIZZA CRUST. I mean, if you can handle eggs, find a pizza crust recipe that calls for eggs. They’re more reliable. But if you’re like me, and you shit like crazy within an hour of eating egg, well, here we go.

The recipe is adapted from Gluten-Free Artisan Bread in 5 Minutes A Day, which is a total fucking misnomer because when I read that title I think, great, I’ll do 5 minutes today, and 5 minutes tomorrow, and 5 minutes the next day, and I’ll have awesome bread all the time. Nope. It’s more like, Gluten-Free Artisan Bread in an Average of 5 Minutes A Day, If You Have Hermione’s Time-Turner.

But whatever.

The idea is make a huge batch of dough, use a little at a time, and keep the rest in the fridge. It’s a good idea because I’m having pizza tonight. The proof is in the pudding.

Here’s the master recipe, with one important mental energy-saving tweak: I use Bob’s Red Mill 1:1 Gluten Free Baking Flour (not to be confused with Bob’s Red Mill Gluten Free All Purpose Baking Flour, which is not low-FODMAP and kind of weird) instead of making my own blend at home. This saves my brain, and it WORKS.

  • 6.5 cups Bob’s Red Mill 1:1 Gluten Free Baking Flour (2 lb 3 oz, if you’re going by weight)
  • 1 tablespoon granulated yeast aka 1 packet aka 0.35 oz
  • 1 to 1.5 tablespoons kosher salt, aka 0.6-0.9 oz
  • 2 tablespoons sugar aka 1 oz (this is technically optional, but does help the yeast do its thing and helps the bread brown)
  • Lukewarm (100 degree F) water, 3.75 cups aka 1 pound 14 oz

Combine all the dry ingredients in a large mixing bowl and mix well.

Add the water and mix with a big spoon, a stand mixer with dough hook, or a heavy duty food processor with a dough hook and a 14 cup (or larger) bowl. Once completely mixed through and smooth, mix for an additional minute.

Cover the bowl loosely with beeswax wrap or plastic wrap (or if your bowl has a lid, fit it on there but leave it cracked). Allow the dough to rest on the counter for 2 hours.

And now your dough is ready to store or to bake! To store, pop the bowl in the fridge and leave the wrap or lid loose. Use within 10 days.

FOR BREAD/BAGUETTE/ROLLS: Tear off hunk(s) of dough of desired size and shape on a big piece of parchment paper. Don’t smush down the dough–you’ll end up with a brick. You can shape it most easily with wet fingertips. Allow to rest for 1 hour, during which time you’ll preheat your oven to 450 and place an empty broiler tray or cheap pie pan on the bottom rack of the oven. If you have a pizza stone, put that in the oven to preheat as well. If you don’t, put your heaviest baking sheet in the oven to preheat.

After an hour’s rest, slide the dough-on-parchment onto the pizza stone or baking sheet. Pour a cup of water into the broiler tray or pie pan to create steam while baking–this helps develop a crisp yummy crust. For a crispier bottom, pull out the parchment paper after about 20 minutes in the oven.

A 1-pound boule bakes for about 45 minutes, until the crust is browned and firm to touch. Adjust baking time for smaller or larger loaves.

Then, let the loaf cool. All the way. I KNOW. WHAT KIND OF TORTURE IS THIS?! Fuck!! But seriously, the texture hasn’t reached its final form until it’s cooled all the way, for, like, 2 hours. Cutting into it before then can result in a gummier texture. And if you’ve gone through all this trouble already…

But when you DO cut into it, get your favorite lofo DF spread (helllloooooooo Earth Balance) ready because YUM. And the longer the dough is in the fridge, the yummier and sourdough-ier it starts to taste. Yessss.

FOR PIZZA CRUST: Tear off a 1-pound-ish sized chunk. That’s about the size of a big grapefruit. Put a big piece of parchment paper down on a pizza peel or cutting board and plop your dough onto it. Roll it out with a rolling pin to desired shape. I’ve been rolling mine to somewhere between 1/4 and 1/2 inches. Then, let the crust rest for at least an hour.

AN HOUR?! By rolling it out, you’ve smushed down the air pockets that your yeast created during the dough’s initial rest and rise, so you have to let it a) warm to room temp and b) re-rise. Leave it somewhere out of the way and let it do its thing for at least an hour.

About half an hour before your crust is done resting, preheat your oven to 450. If you have a pizza stone, put that in the oven to preheat as well. If you don’t, put your heaviest baking sheet in the oven to preheat.

When all the stars have aligned, slide your crust-on-parchment onto your pizza stone or baking sheet and let it bake for about 12 minutes. At that point, it’ll look pretty blonde but be mostly baked–perfect for topping. Pull it out of the oven and top it quickly before returning to the oven to heat the toppings through.

Oh, yeah. The pizza sauce! Spread it thinly–a thick layer will soggy up your crust.

Here’s an easy AF pizza sauce recipe:

  • 1 14.5 oz can diced or crushed tomatoes
  • 1 6 oz can tomato paste
  • 1/2 tsp dried parsley
  • 1/2 tsp dried oregano
  • 1/2 tsp dried basil
  • Black pepper
  • A dash of white wine vinegar (optional)

Blend it allllll up in your blending apparatus of choice and taste for salt. You could throw in some fresh herbs instead of the dried! Mix it up. As always, check all canned ingredients for lurking onion or garlic powder or other FODMAPs. This will make enough sauce for about 4 pizzas.

Tonight, I’m topping my crust with a thin layer of red sauce, Daiya mozzarella ‘cheese,’ prosciutto, kalamata olives, and roasted poblano pepper.

I’m experimenting with other shortcuts, because as it stands, you still kinda have to work from home/be a stay-at-home parent with an easy-going kid/crew in order to have this pizza ready to eat by dinnertime. I’m trying out freezing the crust after par-baking, for instance. I have my doubts, but it’s worth a try! If I come up with any timesaving or meal prep-friendly hacks, I’ll update.

In the meantime, NOM.

Meatballs!

GF, DF, lofo, egg-free, easy AF. Makes 40ish meatballs, or about enough to fill a 6-cup food storage container.

  • 1 pound ground turkey
  • 1.5 pounds ground pork
  • 1/4 cup chopped green onions, greens only
  • 1/4 cup chopped flat-leaf parsley leaves
  • 1/2 tsp smoked paprika
  • Zest of 1 lemon (this takes these meatballs to another levellll)
  • Black pepper
  • Kosher salt

Preheat oven to 400. Line a rimmed baking sheet with parchment paper. Throw everything in a bowl and mix–your hands work best for this. Roll into 2-tablespoon-sized balls, make sure they’re not touching when you plop them on your baking sheet, and bake for about 12 minutes.

Boom! You just made a dinner or three! Throw your meatballs in the fridge, or if you’re not sure you’ll eat them all this week, throw half in the freezer. To serve, heat in a non-stick pan til heated through and browned a little.

Dinner idea: make a pot of rice and fry up some sliced red/orange/yellow bell peppers with salt and pepper, and call it good.

What’s for lunch?

GF

DF

Egg-free

Low-FODMAP

Today, turkey tortilla roll-up with salsa.

1. GF corn tortillas. I can handle the gums in commercial tortillas, but you can find gumless torts at Whole Foods-esque stores. Or make your own with masa harina and water.

2. Turkey breast lunch meat. You can find plain-ass lunch meat even at Safeway, but I found this stuff at 365 aka Whole Foods. If you’re at a deli counter, do not hesitate to ask questions and have your friendly deli staff member show you the ingredients on every single hunk of meat behind the counter.

3. Vegan mayo (yes, apple cider vinegar and pea protein is lofo, but check your tolerance) and deli mustard.

4. Salsa. This is a combo of the following lofo ingredients, in proportions that I found tasty:

  • Tomato
  • Radish
  • Cucumber
  • Jicama
  • Red bell pepper
  • Green onion, green part ONLY
  • Cilantro
  • Lime juice
  • Salt

Are you on the low-FODMAP diet? Y’know how people are like “fill your plate with veggies! You can never have too many veggies!!” Well, now you can call bullshit on that assertion, cuz FODMAPs are totally dose dependent. For instance, jicama. In small servings, less than 300 grams, it’s lofo. So I can handle it in this salsa as long as I don’t eat the whole bowl. I’m having maybe a quarter of a cup of a salsa like this at a time, so I know I’m still in the green. But it’s something to keep in mind. I do use some fruits and vegetables that are lofo/”green” on the Monash Univery FODMAP app in small quantities, but always keep them within the “green” serving size.

I learned my lesson by having more than 15 green beans a few weeks ago.

DON’T DO IT.

So have some salsa.

Keyword some.

Holy. Shit.

So it’s been a while.

Since I last posted on this blog, I got pregnant, had a kid, got a rad job, got rectal cancer, quit that job, did the whole cancer treatment life upheaval thing, and am now authentically living the life of my dreams (plus the occasional episode of fecal incontinence and griefsplosion, though the two don’t necessarily always go hand-in-hand). I’ve been through childbirth, chemo, radiation, more chemo, wild surgeries, and a lot of cannabis.

And I’ve been surrounded by love and angels the whole frickin time.

So why am I back to a blog platform? Because in working to heal and recover and integrate, my precious guts have needed some pretty specific dietary consideration. And I’m finding others who hear I’m doing the low-FODMAP thing and are like OMG ME TOO WTF DO I EAT MY DOCTOR GAVE ME A HANDOUT AND EVERYTHING HAS GARLIC IN IT AND I AM SO HUNGRY.

So I’m gonna start posting some recipes, template-y recipes, and food ideas. I have missed exciting, delicious, healthy-ish foods. I’ve gone through a veritable shitload of cream of rice in the last few months and now I’m getting more creative and using my kitchen skills and tools. So I’m gonna share what I’ve been learning.

Currently, my diet looks like this:

  • Gluten-free (since 2008!)
  • Dairy-free (except for some ghee here and there)
  • Egg-free (had my gallbladder removed in December and still can’t eat eggs)
  • Seriously low-FODMAP

Sound relevant to your interests? Join me, and together, we can rule the galaxy!

jesse’s prairie hipster flapjacks

Jesse’s the king of weekend breakfasts. He makes the world’s best oatmeal, full of raisins and fruit and cinnamon and marinated to a thick congealed perfection that sounds gross because of my word choice but is in fact sublime. He makes omelets with an array of ingredients and fillings that should constitute overkill but is instead harmonious and exciting. And he makes pancakes.

A few years ago, they were banana pancakes, made with the Jack Johnson song of the same name obligatorily playing in the background. I ate them with peanut butter and swooned.

But then I went gluten free.

Since then, we’ve tried other pancake recipes… but here’s the deal. I eat a carby breakfast and not 90 minutes later, I’m a ravenous fucking mountain lion. My body cries for protein and the hunger nuke that detonates in the kitchen sometimes takes out innocent civilians. Jesse, having been a casualty of this post-carb terror, had written off the pancake as a viable breakfast strategy… until a few weeks ago, when we tried an almond meal pancake recipe from some paleo diet blog and didn’t get hungry again for 6 whole hours. Because we had just eaten the equivalent of like 90 almonds or something.

Then last weekend Jesse made buckwheat pancakes using this Mayo Clinic recipe and we really dug the funky, slightly bitter flavor that the buckwheat contributed to the mix. But I still wanted to take hostages 2 hours after I ate mine. So this weekend, Jesse riffed on the recipe and I have a feeling he’s gonna be safe. At least until lunch.

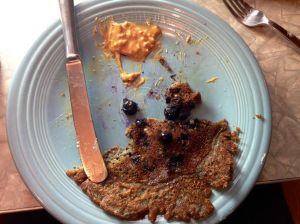
prairie hipster flapjack with peanut butter

Jesse’s Prairie Hipster Flapjacks

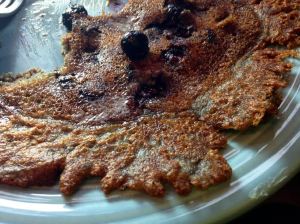
I asked Jesse to name his creation, and this is what he came up with. Says Jesse, “’Prairie’ because they’re rugged and hardy and ‘hipster’ because they’ve got a lot of nuance going on that you probably wouldn’t understand. Also they’re gluten free.” They’re not really cake-y and pillowy, so if that’s what you’re into you may need to look elsewhere. But I took a bite of the crunchy golden lacy edges and proclaimed them the best pancakes I’d ever tasted. We top ours with butter and real maple syrup (though sometimes I miss that shit in the bottle with the little magic color-changing microwave sensor on it).

Ingredients

  • 2 whole eggs
  • 2 tablespoons of canola oil
  • 1 cup almond milk (plain or vanilla—you could use any kind of milk here, probably, but this is just what we keep on hand)
  • ½ tsp vanilla extract
  • ½ cup buckwheat flour
  • ½ cup cornmeal, medium grind
  • ½ cup almond meal/flour (we used the Bob’s Red Mill stuff)
  • ¾ cup gluten free baking flour blend of choice (ours had equal parts white rice flour, potato starch, and tapioca starch)
  • 2 tablespoons of sugar
  • 2 tablespoons baking powder
  • pinch of salt
  • 1 cup plain sparkling water
  • 1.5 cups mostly-thawed frozen blueberries

Method

In a medium bowl, whisk the eggs, canola oil, vanilla extract, and almond milk together.

In a larger bowl, combine the flours, baking powder, salt, and sugar. Add the egg mixture and combine thoroughly. Then add the sparkling water and stir until just combined.

Place a nonstick frying pan or griddle over medium heat. Add a generous amount of canola oil—this’ll help to create lacy crispy edges.

When the pan is just ready, swirl the blueberries into the pancake batter.

Scoop about half a cup of pancake batter into the pan. Cook until the top surface of the pancake is bubbly and the edges are beginning to brown (2-3 minutes). Flip and cook until the bottom is browned and the pancake is cooked through, about 2 minutes longer. For consecutive pancakes, you’ll have to stir the batter before scooping as the coarser grains and the blueberries will sink.

Recipe makes 5 giant pancakes that just about cover the entire surface of a 9” pan. The batter holds well in the fridge for a day or three.

prairie hipster flapjack 2

Other ideas: Swap out the blueberries for a couple sliced bananas. Skip the fruit entirely and add cinnamon and ginger or pumpkin pie spice to the batter. Make ‘em plain as a jaybird is naked and slap a runny fried egg on top.

annie’s granola bars with a kick

So today I went and had a body composition analysis performed at my gym. Hydrate well the day before, neither eat nor drink several hours beforehand, take off all your jewelry (yes Annie, including your nose stud), and stand barefoot on this funky platform and hold these bizarre metal handles and poof. Your percent lean body mass for each limb and your trunk. Your ratio of extracellular water to total body water. Your percentage of body fat. Oh my.

Upon receiving my results I, a woman of action, immediately signed up for my favorite trainer’s “boot camp.” (Thankfully, she hates that term, too.) Which happened to start 45 minutes later. But there I was, in sweatpants and without any food or water on board. Could I make it?

My gym is 12 minutes from home. I could run home and change into workout clothes quickly, but what about fuel? What I could eat that would sustain me without making me puke halfway through the workout? Fortunately I had a fridge full of these bad boys. I hit home, changed, grabbed one of these and popped a Nuun tablet in a bottle of water. I munched en route and got there just in time to run up and down stairs sideways, do lots of side plank, and throw medicine balls at my husband’s boss’s daughter’s chest.

That last one was a bit unexpected.

Anyway. The bars.

My mom and step-dad want the recipe. My coworkers sniff with envy when I break one out. Jesse said they’re the “treat” of his lunchbox! That made me feel very good about myself.

These granola bars were born out of a desire to replace the Zone bars we’d been buying with something cheaper and a little less artificial. I’ve tried a bunch of no-bake recipes popular now on the Internet but they all seemed to crumble, or leave me wanting more protein. I’ve made granola bars in the past, but they were complex and a little too righteous. I needed something hearty, easy to throw together while multitasking, and good enough that I actually look forward to eating. I use high-quality but accessible ingredients here–the packages of soy flour and coconut flour last for many batches, and I can even find these at my Albertson’s. Nuts and chocolate you can buy in bulk. I get giant containers of Craisins and peanut butter from Costco, and that shit never goes bad.

holy peanut butter batman

Oh my god, that’s a lot of peanut butter. Shown with a normal jar for scale.

Anyway, this recipe is more of a guideline (have I ever really written a *recipe* recipe, though?)–each batch I’ve made has been slightly different than the last, and sometimes that’s just because I don’t pay attention to what I’m doing. Oops. The last batch I made, for instance, had almost a cup of coconut flour rather than the half cup I’m calling for here, and I had to add another egg to account for the extra dry volume.

So mess around. Here’s the principle you want to keep in mind: mix your dry ingredients with enough sticky stuff to hold it all together. Simple enough! If you added so many chunks of things or flours that it’s not holding together with the wet ingredients listed here, add an overripe banana or another egg or something. Don’t worry.

Annie’s Granola Bars with a Kick

Ingredients

  • 1 cup gluten-free old fashioned rolled oats (Bob’s Red Mill FTW)
  • 1/2 cup soy flour (that shit is 35% protein!)
  • 1/2 cup coconut flour (high in fiber)
  • 1/2 cup chopped nuts of any kind–hazelnuts are my favorite so far
  • 1/2 cup dried cranberries or other sweet dried fruit
  • 1/2 cup chocolate chips
  • 1 cup chunky natural peanut butter (the runny stuff made only of peanuts and salt)
  • 1/2 cup honey
  • 2 to 3 large eggs
  • 1/2 tsp vanilla extract
  • 1 tsp cinnamon
  • 1/4 tsp nutmeg
  • 1/8 to 1/4 tsp cayenne (I have a problem, I know)
  • 1/8 tsp kosher salt

Optional add-ins:

  • crystallized ginger
  • chocolate-covered espresso beans
  • more dried fruit
  • more nuts
  • Rice Krispies or other cereal (as this adds significantly to the dry volume, either plan to decrease the volume of flours you use, or add an extra egg)
  • al dente quinoa

Instructions

Preheat the oven to 350 degrees F.

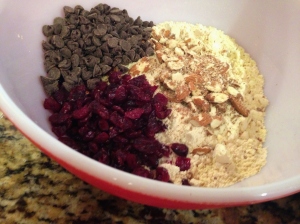
Mix together your dry ingredients in a large bowl–everything from the oats to the chocolate and any add-ins you fancy.

dry

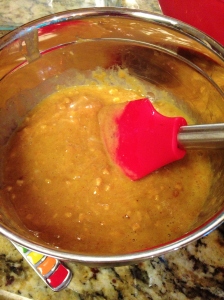
In a medium bowl, mix your wet ingredients and your spices with a silicone spatula.

wet

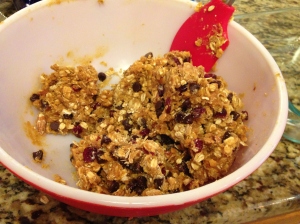
Pour your wet ingredients into the dry and stir and mix and smoosh everything together like crazy. The dough should juuuust stick together if you press the spatula into it pretty hard.

gimme some dough

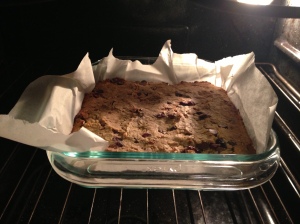
Line a 9×9 glass baking dish with a sheet of parchment paper. Dump in your dough and work it into the corners with your spatula. Smoosh the dough into a uniform layer, pressing hard to create the densest brick possible.

they're starting to smell goooood

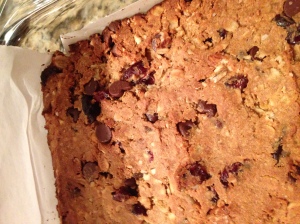
Pop the bars into the oven for 25-30 minutes. The edges will tell you when you’re done–the top does become a little toasty golden, but the edges are your limiting factor as they tend to burn. Allow to cool and then use a big chef’s knife cut the mass into whatever size bars you desire. We usually end up getting about 10 bars out of each batch. Well, 9, because we immediately split one. For quality control.

wait til they cool

These keep me going during a long shift, or on a long hike. They help prevent homicidal ideation while running errands. And, as my step-dad observed, the cayenne leaves just enough of a burn on your lips to remind you that you had something special.

Enjoy! And tell me what you do to make them your own.

WILT #28, in which I lacquer on

Ever since I was a little kid, transition was a challenge for me. My mom tells me about bringing me home from preschool and putting me in my room to play quietly for a while. She knew even then that I needed extra time to decompress from the bustling activity of a classroom full of newly-socialized 4-year-olds and Playskool toys and chubby crayons.

Sometimes, as an adult, it’s easy to forgo that essential decompression phase during a time of adjustment. Sometimes, even a really positive change (*ahem* new job with no commute *AHEM*) can trial one’s equanimity. It might just be where I live right now.

springy

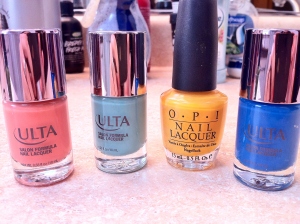
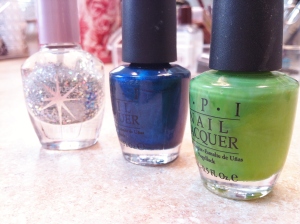
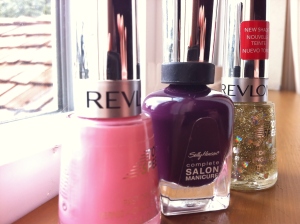
So today, I am going to paint my nails.

Back in college, I shadowed a very sassy neurologist who kept a little vinyl bag in her desk. It was her emergency baggie, she said. In it, she had a few sachets of Black Cherry Berry tea (yech), a tube of crimson lipstick, and a bottle of sheer shimmery pink nail polish. If the day was really going to hell, she could throw on a coat of polish or a swipe of the lipstick and through some mystical femme magic, strike an emotional reset button.

ooh that one's sparkly

I don’t mean to take something so purely whimsical to such a rational place, but listen: it’s grounding to look at your fingertips and see a color that you chose, that you made time to lacquer on. It’s a reminder that you have a little little tiny power over a little tiny thing–little and tiny, yes, but you see it every waking moment of your day.

And it’s cute, dammit.

yes. the gold stars and the purple.

Painting my fingernails provides some (perhaps false, but still effective) sense of control over my life, and reminds me to take things lightly. Whimsy is an essential co-factor in the synthesis of resilience.

awwww <3 <3 <3

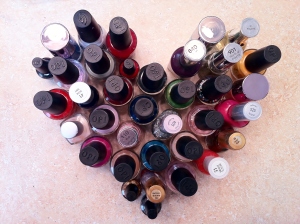
Now, if I could just pick a color…